
How to Grow Calico Aster in the Garden
The calico aster (Symphyotrichum lateriflorum) is also called starved aster. It is a member of Asteraceae family. Linnaeus, a Swedish botanist classified the species of this plant in the 1700s. In the early 20th century, two botanists called “Löves” fine-tuned this classification. One of them was from Iceland and the other was from Sweden.
This article elaborates on the overview, propagation, maintenance, and uses of the famous calico aster.
Table of Contents
Overview on Calico Aster
Calico aster is an eastern North American native plant. The British usually refer to this plant with older names including Aster diffuses, Aster lateriflorus syn and Aster vimineus.
Generally, calico aster forms clumps at the base. It is a normal perennial plant, exhibiting herbaceous characteristics. The stems are hairy, purplish, and stiff. They tend to branch laterally. They form simple leaves and beautiful small flowers on them.
The blooming season for this plant is from late summer to fall (autumn). Normally, the plant grows 120 cm (47 in) tall and 30 cm (12 in) wide. USDA recommends Hardiness Zones 3 – 8 to grow this plant. This plant can also grow in local moist woodlands, with almost no maintenance.
Generally, the garden loses its shine after the blooming period. Most of the aster varieties including calico aster provide late color to the garden after the main flowering season. The Royal Horticultural Society awarded its famous “Garden Merit award” to calico aster.
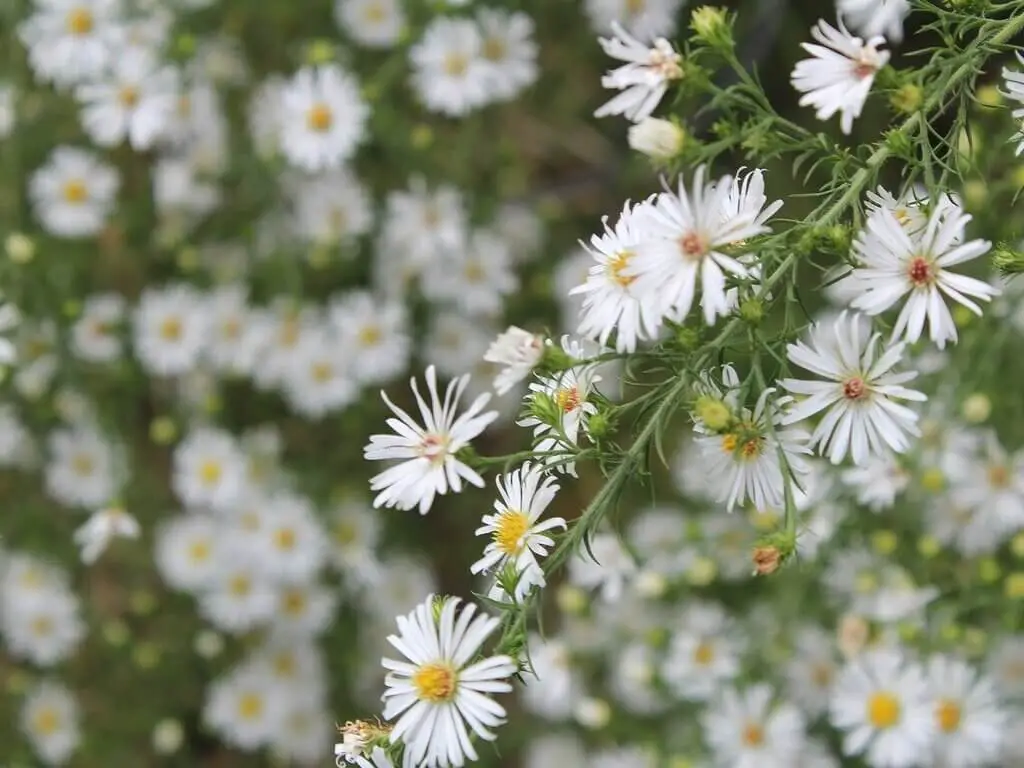
Flowers
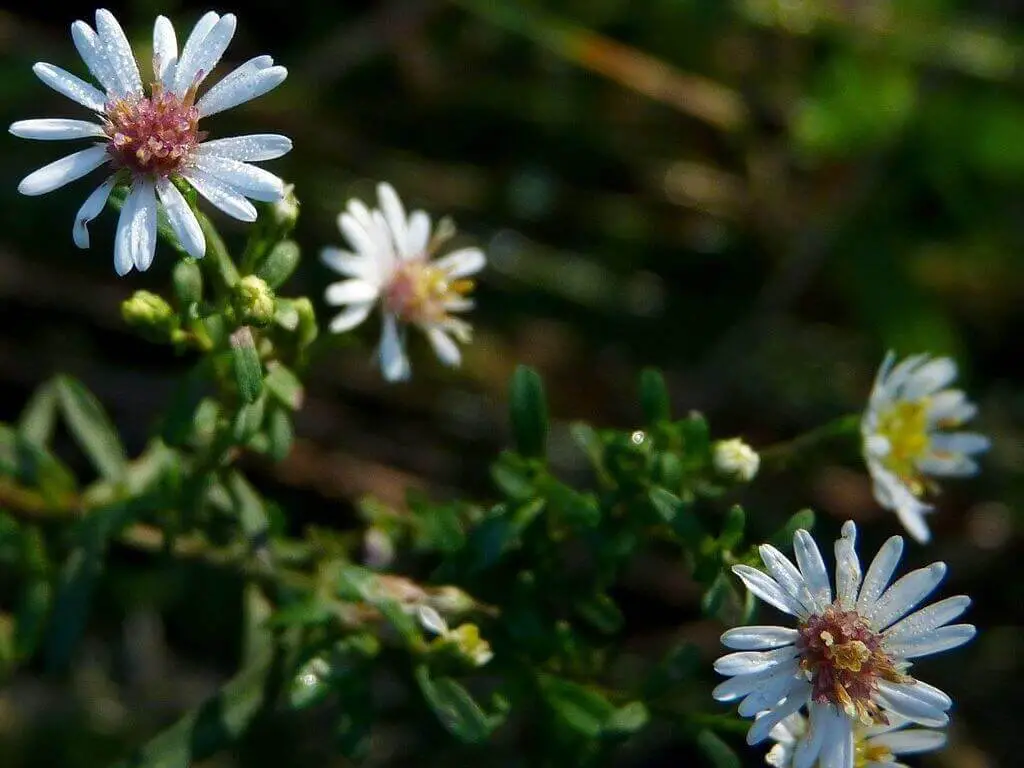
Photo by John B (Wikimedia Commons) (CC BY 2.0)
These corymbs born small flowers usually measure 15 cm (6 in) across (Diameter). Delicate white rays sprout out surrounding these yellow central disks. These yellow disks normally turn shades of pink and red as they mature. Generally, these flowers mature at different intervals of time. Therefore, they provide a beautiful multicolor “calico” Look.
Most of the aster varieties have longer thin nectar tubes. Comparatively, this aster variety has short nectar tubes. The flowers attract a number of beneficial insects with a short proboscis. Mining bees are a perfect example of beneficial insects feeding on calico aster flowers.
During fall, the flowers turn to seed, forming tufts. The tufts are usually light brown or white in color. Normally, the winds disperse the seeds in tufts to different locations on the ground, resulting in self-sow.
Foliage
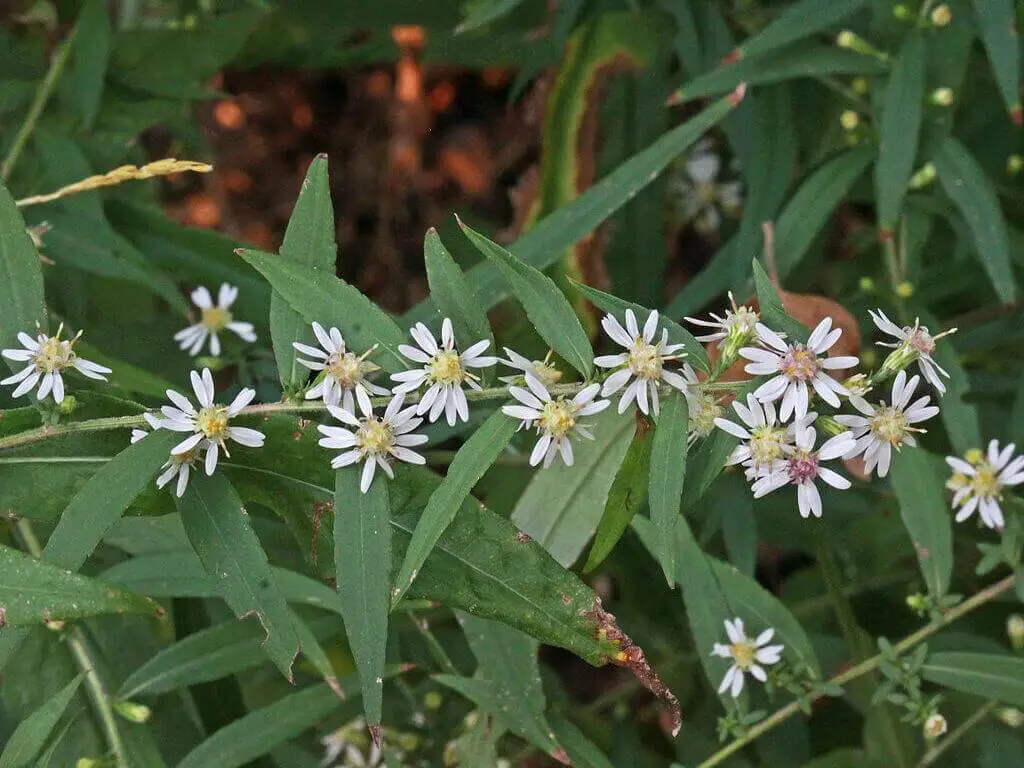
Photo by Andrey Zharkikh (Wikimedia Commons) (CC BY 2.0)
Normally, the color of the foliage is green and the shape is narrow. Some large leaves also have visible serration. The leaves are generally, 4-6 inches near stem bases. They also become gradually smaller and smaller as they approach the stem apex.
Some leaves may also have hairs underneath. As fall approaches, the foliage turns to bronzy shades. This scenario provides a distinctive look to the onlookers. However, this is the normal characteristic of this plant.
Calico Aster – Propagation
This variety of plants is mostly spread by self-sowing and also by rhizomes. Normally, if you purchase the natural botanical species of seeds, they can replicate the genetically determined characteristic (traits) of parent plants. You cannot expect the same with hybrid or cultivated varieties.
Calico Aster grows vigorously. So, it needs a large space to grow freely. If you live in cooler areas, plant them in sunny locations. If you live in warmer areas, plant them under partially shaded areas.
This plant grows healthy in well-draining, organically rich soil. It is also recommended to plant this plant in soil having a PH value of 5.2 – 7.5. Add leaf mulch or compost to the soil. It can improve soil quality and acidity.
Your local agricultural authorities can help you in testing the soil if you opt to do so. Generally, this option is a rare need. If the soil is of very poor quality, apply the fertilizers periodically.
There are three methods of Propagation Viz., seeds, divisions, and stem cuttings.
From Seeds
Just work the soil down with a good-quality garden shovel about afoot. Make sure the soil is loose and crumble. Sow the seeds at a depth of 1/8 inch. Make sure to have a distance of 3-5 feet between them. This increases the airflow between the plants after their growth.
You can use also plant the seeds in a planting medium. Make sure the container is at least 12 inches deep and 18 inches wide. Water them regularly as container soil dries out more quickly than ground soil. Later, when they sprout a couple of true leaves, transplant them in your garden.
Maintain even moisture (an inch per week) during the entire first growing period. Also, apply a good quality well-balanced fertilizer like 10-10-10 (NPK) to increase the health of the soil. The application instructions usually come with the fertilizer package.
Normally, once established, this native plant will not require fertilizers. But if your soil is of poor quality, the plant may need soil fertilization repeatedly, as mentioned earlier.
It is advisable to plant the seeds anytime from spring to fall.
Cuttings
Cut off the soft, fresh 6 -7 inch new stems using good quality sharp pruners. Do this in the springtime or summer season. Remove the leaves and other stuff from the bottom portion of stems (clean off 3-4 inches).
Dip the bottom end of the steam in a good-quality powdered rooting hormone. Plant the stem 2 – 3 inches deep in a potting medium. Make sure the container has good drainage.
Always keep the plant out of direct sunlight and maintain even moisture. Cover the container with a large plastic. It helps to maintain a moist environment and also promotes condensation.
When you see new growth with fresh tiny leaves, the plant is ready to acclimate outdoors. Finally, transplant the grown cutting to your garden. Water the plant occasionally.
Division
Typically, Divison is easy and more successful. Do this in the springtime. You can simply dig the entire clump up. After that, Divide the crown portion and root portion by cutting the plant into two or more sections.
Finally, remove any dead growth of left-out stem parts by hand. Now replant the divisions in suitable locations.
Sometimes you may just chip off the crown and allow the stem to regrow. This depends on how you desire. Always use proper garden gear for your own safety and also plant’s safety
You can also find a more detailed guide on how to divide plants for propagation here.
Caring for Calico Aster Plants
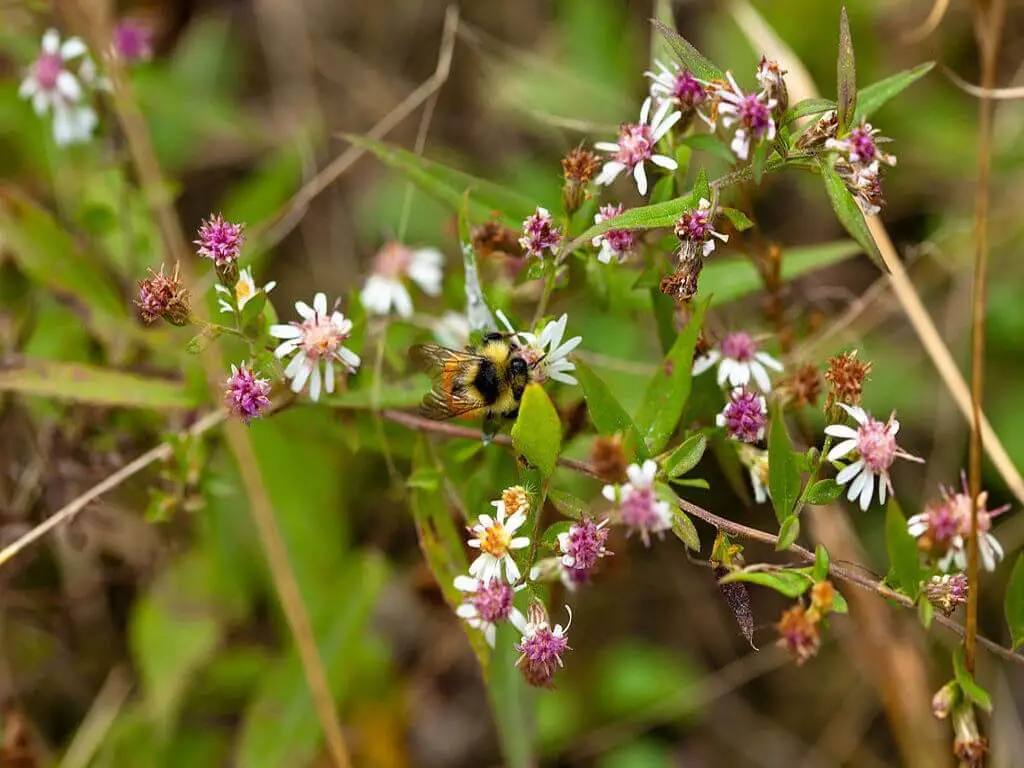
Photo by Melissa McMasters (Wikimedia Commons) (CC BY 2.0)
Generally, Asters can self-maintain themselves. Their fending ability increases when we plant them in ideal locations. That simply means, if you have planted calico aster in partially shaded, well-draining fertilized soils, your job is almost done!
Maintain even moisture (an inch per week) during the entire first growing period. If you desire to grow more compact plants, just chip down the stem tips in early summer.
Divide the old plants once in 2-3 years. This provides them with fresh energy to grow and also improves airflow between them. Generally, airflow between plants resists fungal infection to a great extent.
Sometimes, the plants become “leggy” with age. In this case, just stalk them with normal bamboos. This prevents the plants from falling over.
If the plants become too leggy’, they will flop over and break. In this case, just trim the plant to the ground and remove it. This step is necessary to prevent decay and control plant-related pests, diseases, Etc.,
Remove the weeds in the vicinity of the plant. The weeds can minimize airflow, cater to pests, and various diseases. They can also ruin the plants of nutrients and can suck water poured for plants. You can easily control or remove weeds using a good quality Weed Wacker. This equipment can ease your job with almost no effort!
You also have the option of collecting seeds from aster plants, use them for self or give them away. Remember, these plants do self-sow.
Collecting Seeds
There are three ways in which you can collect the flower heads. The first method involves cutting down the entire stalks having clusters of flowers and letting them dry. The second method involves snipping off individual dry flowers, holding a grocery bag under them. The third method is also the same as the second one, but waiting till you see a few dry heads instead of plucking individual flowers.
Simply bind the harvested stalks like a bouquet and suspend them upside down. Place a clean cloth below to catch the loose, falling seeds. In the case of individual flower heads, spread them on a newspaper as a single layer. This increases the airflow between the dried flowers.
Leave this arrangement undisturbed for about a week. Allow the flower heads to dry completely.
After that, just rub the seed heads of individual flowers with your thumb and index finger. Seeds will drop out of the cottony heads along with debris. Clean the debris off, collect the seeds in a jar.
Store the seeds in an airtight container preferably in a cool, dark, and dry place. You can use them during the next season. You can also sell them or give them away to your customers or friends.
If you use true botanical species seeds, they will exhibit original parental characteristics. However, you cannot expect the same from the hybrid varieties.
Calico Aster – Diseases and Pests

Photo by Andrey Zharkikh (Wikimedia Commons) (CC BY 2.0)
Mostly native plants do not suffer from various diseases and pests, compared to non-native varieties. Also, some varieties are specially bred for disease and pest resistance.
In spite of all these exceptional characteristics, they can suffer pests and diseases if they come under stress. Normally, if you pour too little water or too much water, these plants come under stress. Hence watering ideally is a very important factor.
Weather
If the plants encounter prolonged hot and dry seasons, they sometimes become very weak. The leaves of the plant may turn brownish and can even drop off completely from the plant.
Also, if the plants encounter prolonged cool and wet seasons, they will become weak. The leaves of the plant may turn chlorotic or yellow-shaded.
Diseases
Be aware that, Chlorosis may also be a sign or precursor to aster yellows. It is an incurable disease. The aster leafhopper (Macrosteles quadrilineatus), spreads bacterial parasites (phytoplasma). This parasite is the root cause of Chlorosis.
If you encounter this scenario, remove the affected plants as a whole immediately. This can prevent the disease from spreading to other healthy plants. You can buy an online guide to managing aster yellows.
During wet weather conditions, the humidity builds upon plants. This may lead to fungal infection, commonly known as powdery mildew. In general, the leaves affected by these Fungai have a whitish or greyish powder coating on them. But it is not a matter of concern. It has very little or no effect on the flowers. You can easily treat this with good-quality fungicide.
Pests and Animals
Generally, if waterlogging happens, the plants tend to root rot. The logging water can cater to Aphids, snails, and slugs, which ruin the plants as a whole. So, ensure proper drainage facilities in the garden and planting areas.
You can also plant anise hyssop, yarrow, Etc., to deter the herbivores’ animals, particularly rabbits and deer. Generally, if you fence your garden, you can prevent most of these animals from entering your premises.
Uses of Calico Aster Plants
Generally, you can use Calico aster for mass planting. You can also use it as a property perimeter. It will quickly form a loosely packed beautiful hedgerow. You just have to prune it for shaping. If you stalk them accordingly, they can form a texturally rich backdrop.
You can also interplant Calico aster with other varieties of white asters like a joe-Pye weed, coneflower, phlox, Etc., it exhibits distinct attractive looks.
Generally, Asters are known for their sturdy and long-lasting capabilities. Hence, they can fit perfectly well in both dried and fresh flower arrangements. In floral designs, they can serve as excellent “fillers” with their profuse tiny blossoms.
DISCLAIMER
The information in this article or any other article on our website is for gardening and educational purpose only. Before consuming any herbs or greens, we recommend you consult certified physicians.
Similar Posts
Growing Motherwort Plants in Gardens
Growing Mexican Oregano Plants